I love wearing headbands! But, my pocket book is not always willing to spend a lot of money on headbands. I have found that a lot of the cute headbands cost any where between $10 and $20. No, thank you; I can make my own for a lot cheaper and cuter too! Plus, these will be custom made and a million other girls will not own them either. =D
How to Make Your Own Headbands

Supplies:
- 1/4 yard of Fabric (You can also just use scraps that you have laying around.)
- 1/4 inch wide elastic
- Thread
- Sewing Machine
- Iron
- Trimmings (Rick-Rack, Buttons, Lace, Fabric Flowers, etc…)
- Fusible Webbing (Optional) [Mine is 1/2 inch wide, sticky on both sides, and comes in a box. You don't have to have this, but I like how it makes the headband a little more sturdier, and I have less pinning to do when I sew the headband.]
1. The first step is to measure your head. Like how I did in the picture below. Take note on your measurement, mine is 22 1/2 inches.
.jpg)
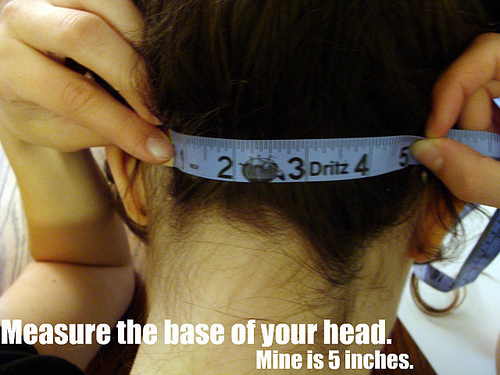
2. Measure the base of your head (see picture below). This is too find out how much elastic you need to cut. Mine is 5 inches.
3. Now it is time for a little math. Follow the instructions below for the next step.

4. Cut out a strip of fabric that is the total of your math problem above (mine came up as 16 1/2 inches) in length, and 3 inches across (You can experiment with different widths for different looks).

5. Fold over an 1/2 inch on each side (the long side). Iron.

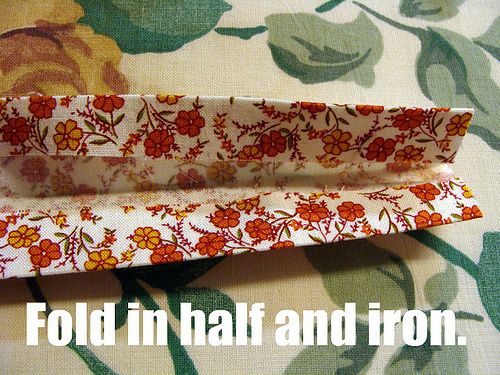
6. Fold strip in half lengthwise. Iron.
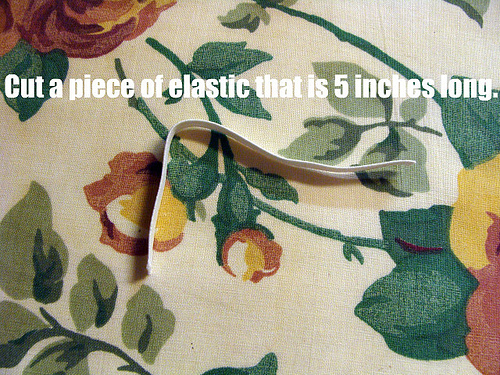
7. Cut a piece of elastic that is the measurement of the base of your head.
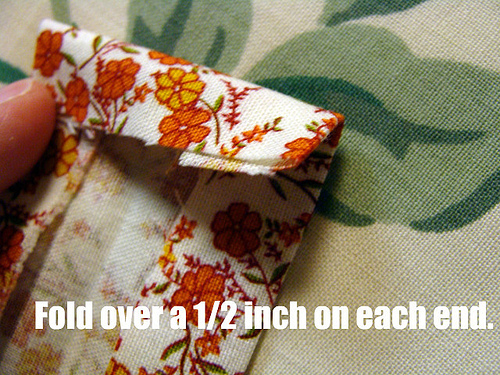
8. Fold over 1/2 inch on each end. Iron.
9. If you are using fusible webbing you will follow the photo instructions. If not, you will just skip to number 11.
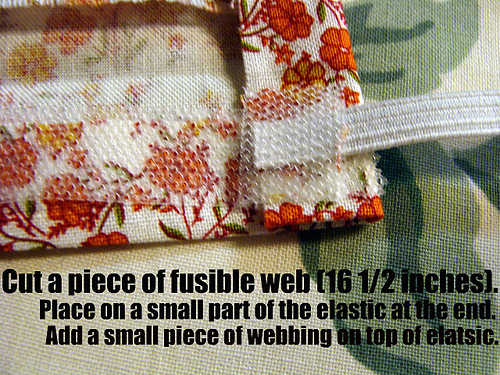
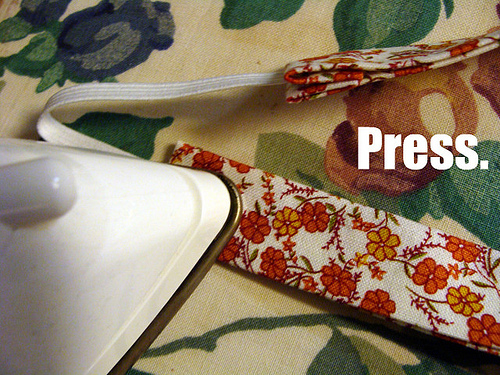
10. Press half way. Then repeat the second half of step nine, place a small part of the elastic on the other end, and remember to add a small piece of webbing on top of the elastic. Finish ironing.
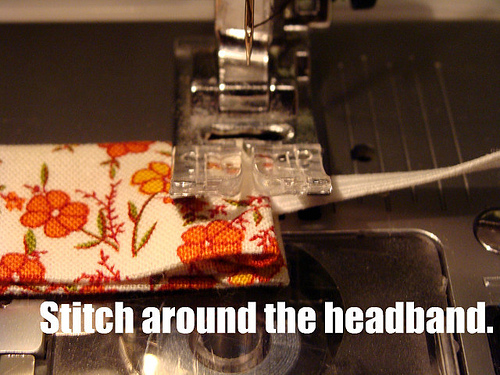
11. Stitch around the open edges of your headband. Make sure to do a few more stitches over the elastic, making sure it won’t come out anytime soon.
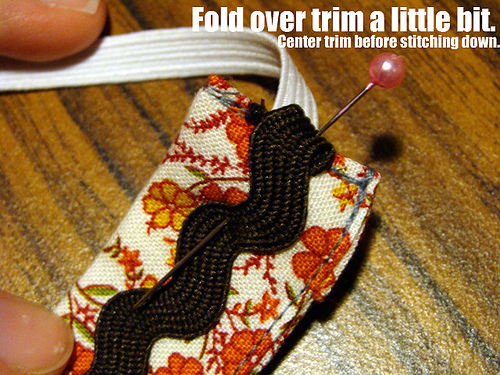
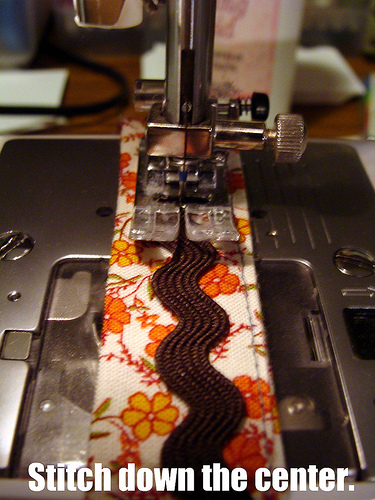
12. Now it is time for the fun part! Embellishing your headband in any way you want. I will show how to add rick-rack down the center of your headband.

Thank you so much, Jen for letting me guest post on your wonderful blog! I hope to see some of you on my blog!
Tradutor
Eu amo tiaras vestindo! Mas, meu livro de bolso não é sempre dispostos a gastar muito dinheiro em headbands. Descobri que um monte de headbands bonito custo em qualquer lugar entre $ 10 e $ 20. Não, obrigado, eu posso fazer o meu próprio para muito mais barato e mais bonito também! Além disso, estes serão feitos sob encomenda e um milhão de outras garotas não possuí-los também. = D
Como fazer seu próprio Headbands
Suprimentos:
* Quintal quarto de Tecido (Você também pode usar apenas pedaços que você tem por aí.)
* Elástico 1 / 4 polegadas de largura
* Tópico
* Máquina de Costura
* Ferro
* Passamanarias (Rick-Rack, botões, rendas, flores de tecido, etc ...)
* Webbing fusíveis (Opcional) [A minha é meia polegada de largura, pegajoso em ambos os lados, e vem em uma caixa. Você não tem que ter isso, mas eu gosto de como ele faz a cabeça um pouco mais resistente, e eu tenho menos pinagem para fazer quando eu costurar a cabeça.]
1. O primeiro passo é medir sua cabeça. Gosto de como eu fiz na imagem abaixo. Tome nota na sua medição, o meu é 22 1 / 2 polegadas.
2. Medir a base de sua cabeça (ver figura abaixo). Isso é muito descobrir o quanto elástica você precisa cortar. O meu é de 5 polegadas.
3. Agora é hora de um pouco de matemática. Siga as instruções abaixo para a próxima etapa.
4. Cortar uma tira de tecido que é o total de seu problema de matemática acima (o meu veio como 16 1 / 2 polegadas) de comprimento e 3 cm de diâmetro (Você pode experimentar com diferentes larguras para olhares diferentes).
5. Dobre um 1 / 2 polegada de cada lado (o lado mais comprido). Ferro.
6. Strip Dobre ao meio, longitudinalmente. Ferro.
7. Corte um pedaço de elástico que é a medida da base de sua cabeça.
8. Dobre 1 / 2 polegada em cada extremidade. Ferro.
9. Se você estiver usando cinto fusível você siga as instruções da foto. Se não, você só vai pular para o número 11.
10. Pressione a meio caminho. Em seguida, repita a segunda metade da etapa nove, coloque uma pequena parte do elástico na outra extremidade, e lembre-se de adicionar um pequeno pedaço de teia em cima do elástico. Concluir de engomar.
11. Costure em torno das bordas abertas de sua cabeça. Certifique-se de fazer mais alguns pontos sobre o elástico, certificando-se que não sairá tão cedo.
12. Agora é hora da parte divertida! Embelezando a sua cabeça em qualquer forma que desejar. Vou mostrar como adicionar rick-rack no centro de sua cabeça.
Se você quiser adicionar uma flor de tecido como a forma como eu fiz abaixo. Siga estas instruções maravilhoso!
Olá Milena, não conhecia esse seu outro blog, amei, adoro paps, já estou te seguindo neste também, obrigada por disponibilizar esses presentes, abraços carinhosos, Maria Sônia
ResponderExcluirsapekinhaseva.blogspot.com